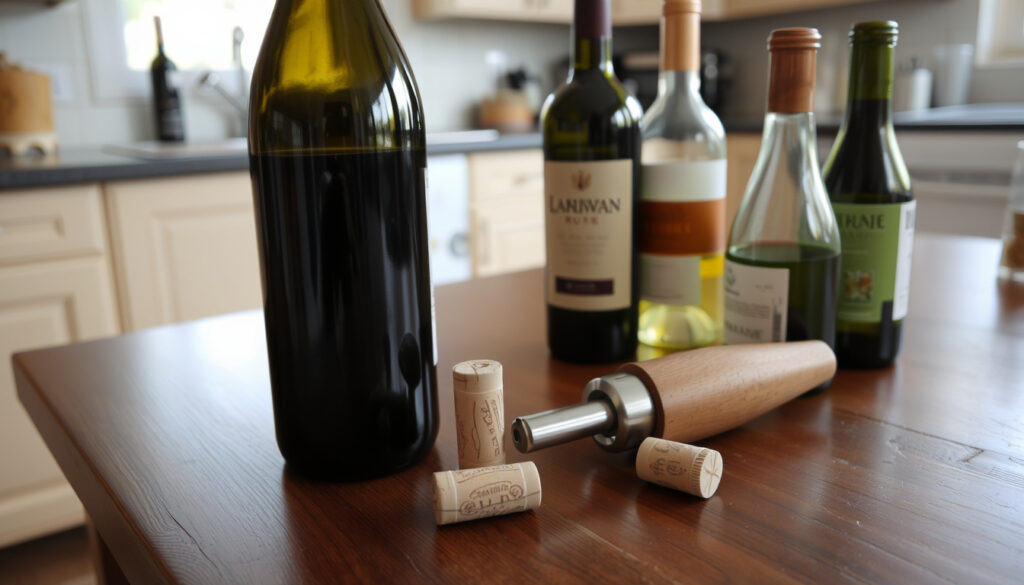
How to Cork a Wine Bottle: 5 Easy Methods for Home Bottling
Corking a wine bottle at home feels like the final flourish of a winemaking project, but it’s also the step that trips up many beginners — the seal you create determines whether your wine ages gracefully or spoils in the bottle. This guide walks through the key methods, from hand-corking to using a two-handle corker, so you can get a reliable seal every time.
Cork types for home bottling: Natural, agglomerated, synthetic, and technical corks ·
Recommended cork soak time: 15-30 minutes in cool water ·
Cork insertion force without corker: Approximately 30-40 lbs of downward pressure ·
Wine bottle upright rest after corking: 24-48 hours ·
Cork sanitization method: Sulfite solution or steaming for 1-3 minutes
Quick snapshot
- Corks should be soaked for 15-30 minutes before insertion (Adventures in Homebrewing (home winemaking supply retailer))
- Bottles should rest upright for 24-48 hours after corking (Northern Brewer (homebrew equipment specialist))
- Corking without a compression tool is difficult but possible (Danny’s Wine and Beer (home winemaking retailer))
- Optimal sulfite concentration for sanitizing corks is not universally agreed (Adventures in Homebrewing)
- Long-term effects of hand-corking on seal integrity are not well documented (Danny’s Wine and Beer)
- Soak corks: 15-30 minutes (Adventures in Homebrewing)
- Insert cork into bottle (Northern Brewer)
- Rest upright: 24-48 hours (Northern Brewer)
- Then store on side for long-term aging (Northern Brewer)
- After 24-48 hours upright, lay bottles on their side to keep corks moist (Northern Brewer)
- Monitor for leaks within the first week (Danny’s Wine and Beer)
- Age wine in a cool, dark place at 50-55°F (10-13°C) (Northern Brewer)
These four numbers determine whether your cork fits snugly or slides out — and they explain why hand-corking without compression is so difficult.
| Property | Value |
|---|---|
| Cork diameter before compression | Typically 24 mm for standard wine bottles |
| Neck inner diameter | Approximately 18-19 mm |
| Compression ratio | Cork is compressed to about 60-70% of original diameter |
| Maximum cork length for home use | 44 mm (Grade 1 natural cork) |
How to cork a wine bottle at home?
Basic hand-corking technique
- Soak the cork in cool water or a sulfite solution for 15-30 minutes (Adventures in Homebrewing)
- Drain the cork for a few minutes before insertion (Adventures in Homebrewing)
- Place the cork on the bottle mouth and push with steady, even force — aim for about 1 inch (25 mm) of headspace (Do It At Home (home DIY guide))
- Avoid twisting the cork; push straight down to prevent damage to the seal
Using a two-handle corker
- Two-handle corkers compress the cork in a chamber before insertion (Danny’s Wine and Beer)
- Soak corks in warm water for up to 15 minutes (5 minutes often enough for short corks) (Danny’s Wine and Beer)
- Place the soaked cork into the corker, pull the handles to compress, then push the piston to insert
- Cost: $20-50 (Danny’s Wine and Beer)
Using a floor corker
- Floor corkers are best for large batches, offering consistent compression (Danny’s Wine and Beer)
- High-quality floor corkers may not require cork soaking at all (Danny’s Wine and Beer)
- Place the bottle on the platform, lower the lever to compress and insert the cork in one motion
- Cost: $80-200 (Danny’s Wine and Beer)
The pattern is clear: the more compression control you have, the less you depend on cork softness — which is why two-handle and floor corkers fail far less often than hand-corking.
How to cork a wine bottle without a corker?
Pushing cork in with a clamp or vise
- Without a corker, the cork must be manually compressed before insertion — a clamp or vise can squeeze the cork to a smaller diameter (Danny’s Wine and Beer)
- Soak the cork thoroughly (15-30 minutes) to make it pliable (Adventures in Homebrewing)
- Apply approximately 30-40 lbs of force to push the cork into the bottle neck — this is physically demanding (Do It At Home)
- Risk of cork breakage or uneven insertion
Using a rubber mallet technique
- Some hobbyists use a rubber mallet to gently tap the cork into the bottle — but this risks breaking the bottle or cork (WineMaker Magazine (professional winemaking publication))
- Place the bottle on a stable surface, hold firmly, and tap the cork with light, even strikes
- Not recommended for thin-walled bottles
Risks of improper corking
- Incomplete seal can allow oxygen to spoil the wine (Do It At Home)
- Excessive soaking can damage cork structure, remove coatings, or make corks too soft (Do It At Home)
- If the cork is pushed too deep, headspace may be insufficient, causing wine to push out the cork
Corking without a corker is possible but risky: the force needed is high, and the seal may not be as reliable. For the occasional bottle, a clamp or mallet might work. For any batch larger than a few bottles, a $20-50 corker is a worthwhile investment.
The implication: hand-corking trades equipment cost for physical effort and seal risk — a trade that only makes sense for one-off bottles, not for any serious winemaking batch.
How long do you soak corks before bottling wine?
Soaking time guidelines
- Optimal soak time is 15-30 minutes (Adventures in Homebrewing)
- Some sources recommend 5 minutes for short corks, up to 15 minutes for longer corks (Danny’s Wine and Beer)
- Aim for a slight softening — the cork should not become spongy (Adventures in Homebrewing)
Cold water vs. boiling water
- Boiling corks is not recommended — it can damage the cork structure and remove protective coatings (WineMaker Magazine)
- Steaming corks for 1-3 minutes is an alternative to soaking (Homebrewing.org (homebrew supply retailer))
- Cool or lukewarm water is preferred for most corks
Sulfite solution for sanitization
- Mix 1/8 teaspoon of sodium metabisulfite per pint of water for soaking corks (Adventures in Homebrewing)
- Soak for 15-30 minutes in this solution (Boomchugalug (homebrew supply retailer))
- Do not rinse corks after sulfite soaking — the residual sulfite helps prevent spoilage (Boomchugalug)
The catch: the ideal soak window is narrow — too short and the cork resists compression, too long and it turns spongy and tears.
Do corks need to be sanitized before bottling wine?
Sanitization methods
- Unsanitized corks can introduce spoilage microbes (Adventures in Homebrewing)
- Sulfite solution (potassium metabisulfite) is the standard sanitizer (Adventures in Homebrewing)
- Steaming corks in hot water for 2-3 minutes also sanitizes and softens (Homebrewing.org)
- Bottles should be sanitized as well — submerge in sanitizer or use a funnel-pour method (Northern Brewer)
When sanitization is critical
- If your wine has residual sugar or low alcohol, it’s more vulnerable to spoilage — sanitization is essential
- For dry wines with high alcohol (above 14%), the risk is lower but still present
- Avoid sanitizing only the corks and neglecting the bottles — both must be clean
Natural cork vs. synthetic cork care
- Natural corks require thorough sanitization; synthetic corks generally need less sanitation (Danny’s Wine and Beer)
- Agglomerate corks (composed of cork granules) need only a quick rinse in sanitizer and should not be boiled (WinemakingTalk (home winemaking forum))
- Some modern corks are supplied ready to use — check packaging before soaking (Do It At Home)
Sulfite solutions are effective, but the optimal concentration remains debated — too little and you risk spoilage, too much and you risk off-flavors. The standard 1/8 tsp per pint of water is a safe middle ground.
What this means: sanitization is non-negotiable for wine with residual sugar, but for high-alcohol dry wines, a quick rinse may be all you need — so match your protocol to your wine’s vulnerability.
How long to leave wine bottles upright after corking?
Upright rest duration
- 24-48 hours upright allows the cork to expand and seal completely (Northern Brewer)
- During this time, pressure inside the bottle helps seat the cork
- Do not lay bottles on their side before the cork has fully sealed — the wine may leak
Why upright position matters
- A freshly compressed cork is still springy; upright rest lets it expand against the neck walls
- Leaving the bottle upright prevents the wine from contacting the cork prematurely, which could push the cork out
- Keep the bottle away from drafts or temperature swings during this period
Laying down after rest period
- After 24-48 hours, lay the bottles on their side to keep the cork moist (Northern Brewer)
- Moist corks maintain a tight seal and prevent oxygen ingress
- Store in a cool, dark place at 50-55°F (10-13°C) for long-term aging
The pattern: the upright rest window is the cheapest insurance you have — it costs nothing but patience, and it prevents the most common corking failure mode.
Step-by-step corking process
- Sanitize bottles and corks. Submerge bottles in sanitizer or use a funnel-pour method. Soak corks in a sulfite solution (1/8 tsp sodium metabisulfite per pint of water) for 15-30 minutes (Adventures in Homebrewing).
- Drain corks. Let them rest on a clean towel for a few minutes before insertion (Adventures in Homebrewing).
- Fill bottles with wine. Leave about 1 inch (25 mm) of headspace below the cork.
- Compress the cork. Use a two-handle corker or floor corker. If corking by hand, squeeze the cork with a clamp or vise until it fits the neck.
- Insert the cork. Push steadily and evenly until the top of the cork is flush with the bottle rim. Do not twist.
- Rest upright. Place the bottle upright for 24-48 hours to allow the cork to expand and seal (Northern Brewer).
- Lay down for aging. After the rest period, lay bottles on their side in a cool, dark environment.
What we know — and what we don’t
Confirmed facts
- Corks should be soaked for 15-30 minutes before insertion (Adventures in Homebrewing)
- Bottles should rest upright for 24-48 hours after corking (Northern Brewer)
- Boiling corks is not recommended (WineMaker Magazine)
- Steaming corks for 1-3 minutes is an effective alternative (Homebrewing.org)
What’s unclear
- Optimal sulfite concentration for sanitizing corks is not universally agreed (Adventures in Homebrewing)
- Long-term effects of hand-corking on seal integrity are not well documented (Danny’s Wine and Beer)
- Whether floor corkers completely eliminate the need for soaking varies by brand (Danny’s Wine and Beer)
- Optimal steaming time for corks varies by source — most guides recommend 1-3 minutes, but some suggest longer (Homebrewing.org)
What the community says
“I’ve corked a few bottles without a corker — it’s doable but you need a lot of patience. I used a clamp to squeeze the cork first, then pushed it in with the heel of my hand. It worked, but the seal felt loose.”
— Reddit user, r/winemaking (WinemakingTalk)
“For a clean seal, always soak natural corks for 15 minutes in cool water with a pinch of sulfite. Don’t boil them, and don’t skip the upright rest — that’s what seats the cork.”
— Midwest Supplies guide (Adventures in Homebrewing)
For the home winemaker, the choice between hand-corking and using a tool is clear: invest $20-50 in a two-handle corker, and you’ll save yourself the frustration of leaky bottles and broken corks. The 30-minute soak and the 48-hour upright rest are not optional — skip them, and the wine that started as grapes will end as vinegar.
Related reading: Sausage Roll Recipe NZ: Easy Homemade
homekitchenex.com, ebrew.com, youtube.com, reddit.com, liquorlaboratory.com
Frequently asked questions
How do you remove a cork from a wine bottle without a corkscrew?
Push the cork into the bottle using a blunt object (like a chopstick or a pen), then pour the wine through a strainer. Alternatively, use a shoe: place the bottle in a shoe and tap the heel against a wall — the pressure forces the cork out.
What type of cork is best for home winemaking?
Grade 1 natural corks (44 mm length) are best for long-term aging. For short-term consumption (1-2 years), agglomerate or synthetic corks are fine and easier to insert.
How do you store wine bottles after corking?
After 24-48 hours upright, store bottles on their side in a cool (50-55°F), dark place with consistent humidity (60-70%). Avoid temperature fluctuations.
Can you reuse corks?
No — reusing corks is not recommended because the compression cycle damages the structure, and old corks can harbor bacteria. Always use new corks for bottling.
How do you know if a cork is sealed correctly?
After corking, the cork should be flush with the bottle rim or slightly below. Gently tilt the bottle — no wine should leak. Listen for a small pop when opening later; that indicates a good seal.
What is the difference between natural and synthetic corks?
Natural corks are porous and allow micro-oxygenation, ideal for aging. Synthetic corks are inert, easier to insert, and don’t require soaking, but they may not seal as tightly over years.
How do you fix a cork that is too loose?
If the cork is loose after insertion, you may have insufficient headspace. Remove the cork carefully (using a corkscrew or pushing it in), and recork with a fresh cork. For a temporary fix, add a wine stopper.
How do you compress a cork without a corker?
Use a clamp or vise to squeeze the cork to a smaller diameter. Soak the cork first to make it pliable. Apply even pressure, then quickly push the compressed cork into the bottle neck.
More related posts
 NZ Tax Brackets 2025: Rates & Thresholds Explained
 Manage My Health Portal: Login, App, Records Guide
 Wales vs South Africa 2026: Score, TV, Etzebeth Ban & More
 Warriors vs Timberwolves Stats: Head-to-Head & Key Numbers
 How to Divide Fractions: Step-by-Step Guide with Examples
 Cold Sore on Lip: Causes, Triggers & Fast Treatments
 Hello Kitty Coloring Pages: Free Printables, Benefits & Tips
 New Zealand Passport Cost 2025: Fees, Renewal & Urgent Charges